Wednesday, February 29, 2012

Technorati Verification and Claiming for Blogger/Website.

Technorati is a best blogger tool for getting better improvement of your blogger and can monitor traffic.

First of all you should get the User ID and Password of Technorati

1. Log -in-to Technorat,click on your username at the top of the right side see below. 


2. My Profile window will open at the end of your profile you will see the My Claimed Blogs Option just fill your blogger name inside the blank portion than click on Claim Button see below.


 3.As you click on Claim Button a new page will open in the same window there you will see few option for your blogger to fill them and click button Proceed to the next step see picture below.


4. Next Step will show you the blog claim status.


5. Check your Email there you will get an Email from Technorati wich send you a token number just paste your token number anywhere in your post area like this i paste here mine Y4RVAHMJXJAH . see below follow the link.


6. Go Back to your Profile in Technorati and click on  Check Claim Button see below.


 7. Than it will ask for Verify Claim Token Click on it see below.


 8. At the End a massage will show you We are evaluating your claim see below.


You have done

Thanks For coming here.

Y4RVAHMJXJAH 

Thursday, February 23, 2012

Add a Gadget Header into Page Element for Blogger.

Add a additional header Gadget into page element so that the blogger owner can add any other article,picture etc under the header.

Just see the picture below how looks default Header Gadget.


Now we can start how to add extra Header Gadget.

Note: Before Edit your Template take your Template full Backup.

Note: Never forget to click on Expand Widget Template tag before Edit or backup your Full Template

1. First Sign-in to your Blogger click on Design under the Design Tab you will see Edit HTML click on it see below. 


2. Find the Below Code ( By preshing Ctrl+F ) Put the code inside the serch box than Enter see picture below.

showaddelement


3. The code will be look like see below.

 <div id='header-wrapper'>
      <b:section class='header' id='header' maxwidgets='1' showaddelement='no'>
<b:widget id='Header1' locked='false' title='Blogger Help (Header)' type='Header'>
<b:includable id='title'>

4. Just change here these two things.

(showaddelement='no')  to (showaddelement='yes')

maxwidgets='1') to (maxwidgets='2') 

5. Than click on Save Template,go to the Page Element i am sure you will get extra Header Gadget there see Picture also below.


You have done

Thanks For coming here.

Wednesday, February 22, 2012

Center blog title on blogger/Blogspot/Blog

As we give a blogger Title,it displayed into the left side by default at the top of the blogger you can change its place(Center or Right) by making/adding few changes in your blogger's HTML source code.

Note: Before Edit your Template take your Template full Backup.

Note: Never forget to click on Expand Widget Template tag before Edit or backup your Full Template

1. First Sign-in to your Blogger click on Design under the Design Tab you will see Edit HTML click on it see below.


2. Find the Below Code ( By preshing Ctrl+F ) Put the code inside the serch box than Enter.

 header {


3. Under the header { find the code h1 { by moving your mouse cursor a little down and find h1 { see below. 


4. Before doing any changes with your HTML code see the preview by click on PREVIEW tab you will see your header location in preview see below.


5. Now just add the below code under the h1 { code.

                             text-align: center;

6. It will  look like see below.

h1 { 
  text-align: center;
  padding:25px 0px 10px 5%;
  color:$pagetitlecolor;
  background:$pagetitlebgcolor;
  font:$pagetitlefont;
  letter-spacing:-2px;  


 See Picture below too.


7. After adding the HTML code you see the preview first before save Template. 


The Preview will look like as see below.


8. Now Click on SAVE TEMPLATE.
Note:- If yuo want to take blog header title in right side just change in the code like.

For right side code: text-align: right;

For Left side code: text-align: left; (or remove the code)

For Center code: text-align: center;


You have done

Thanks For coming here.

Tuesday, February 21, 2012

Restore a Deleted blog

Unfortunately if you had deleted your blog by taking decision immediately there after you think it happened wrong by you,now you desire to recover it may be this article will be helpfull for you all. 

Note:-  Be remember You can restore your deleted blog if you haven't exceeded the 90 days limit.Google provides a 90 days restoration Limit.

Just follow these few simple step to restore the deleted blog.

1. Log-in-to your blogger you will see a dashboard it will be look like see below.


2.  Now move your mouse cursor up to the end of your Dashboard at the end you will see  an option show all  click on it see below. 


3. As you click Show all option it will show you all deleted blogs see below.
 
Note:-  Must remember the deleted blog age should not be exceed 90 days. 


4. Now just click on the Undeleted this blog option,within few second's you will see the deleted blog come back to your blogs list see below also.


You have done

Thanks For coming here.

Friday, February 17, 2012

Create/Generate and Add AlertPay Donate Button on your Blog/Website.


Donate Button is placed for the financially help of a blog/website owner which given by the visitor if they desire to donate a little amount for help to the blog/website owner and as i think its really helpful for the blogger/Website owner.

Note: This (Donate Button) facility Provide by the AlertPay for Indian Users too but the PayPal India do not  Start this facility for Indian Users. 

Now Just follow these few simple step to create the Alertpay Donate Button see below. 

1. First of all create a new account who Don't have an account? Sign up now. 

Note:-Create New Account with Personal Pro Account Type option.

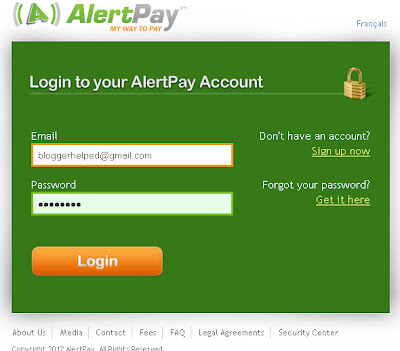
2. Log Into your AlertPay Account see bellow.


3. You will see an option at the top of the right side Business Tools  than click Manage Donations / Generate "Donate Now" button see bellow.


4. There you will see Add Button just click at the button see bellow also.


5. Finally you will get a little form just fill all the required field only and than click Update Button.see Picture bellow too.


6.After clicking Update Button the next page will be opened  you will see the HTML code like see bellow.

Note:- AlertPay Donate Button Create process has been completed now the next step to add your Donate Button to your Blog/Website.


Add AlertPay Donation Button into the blogs.

1. ust Log into Blogger click on Design  tab than Page Element tab now click on Add a Gadget see Picture below. 


2. As you click Add a Gadget tab a separate Window will open just find the HTML/JavaScriptclick on it see the picture below.


3. As you click on HTML/JavaScript into the same window another page will open by the name Configure HTML/JavaScript that will be in two part Title and Content Do not need to give the title name now copy the generated HTML code from the AlertPay  and paste the code under the Content than press save button see Picture below also. 


4. Finally click on save button on your page Element see Picture Below.


5. Than browse your blogger or blog definitely AlertPay Donation Button will be placed on your blog just see an Example Picture below.


You have done

Thanks For coming here.

Blogger Helped